Thursday 18 July 2013

Download Image using AsyncTask in Android

Download Image using AsyncTask in Android

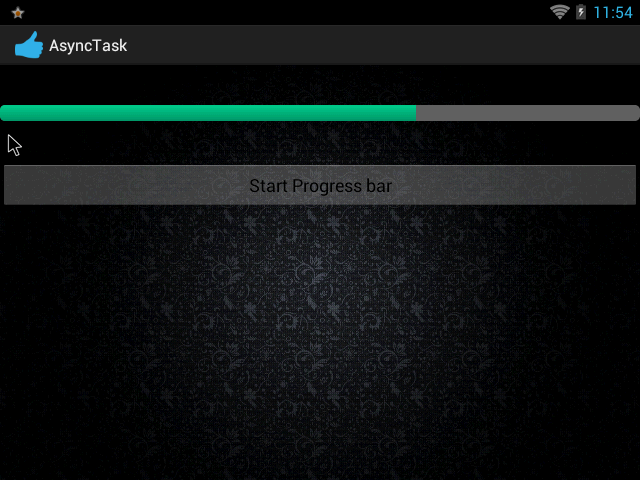
This tutorial explains how to download Image using AsyncTask in Android. The example below download image while showing progress bar while during download.


Understanding Android AsynkTask
Async task enables you to implement MultiThreading without get Hands dirty into threads. AsyncTask enables proper and easy use of the UI thread. It allows performing background operations and passing the results on the UI thread. If you are doing something isolated related to UI, for example downloading data to present in a list, go ahead and use AsyncTask

1) AsyncTasks should ideally be used for short operations (a few seconds at the most.)
2) An asynchronous task is defined by 3 generic types, called Params, Progress and Result, and 4 steps, called onPreExecute, doInBackground, onProgressUpdate and onPostExecute.
3) In onPreExecute you can define code, which need to be executed before background processing starts.
4) doInBackground have code which needs to be executed in background, here in doInBackground we can send results to multiple times to event thread by publishProgress() method, to notify background processing has been completed we can return results simply.
5) onProgressUpdate() method receives progress updates from doInBackground method, which is published via publishProgress method, and this method can use this progress update to update event thread
6) onPostExecute() method handles results returned by doInBackground method.
7) The generic types used are
a) Params, the type of the parameters sent to the task upon execution
b) Progress, the type of the progress units published during the background computation.
c) Result, the type of the result of the background computation.
8) If an async task not using any types, then it can be marked as Void type.
9) An running async task can be cancelled by calling cancel(boolean) method.

Downloading image using Android AsyncTask.
<?xml version="1.0" encoding="utf-8"?>
<LinearLayout xmlns:android="http://schemas.android.com/apk/res/android"
    android:layout_width="fill_parent"
    android:layout_height="fill_parent"
    android:orientation="vertical" >

    <Button
        android:id="@+id/downloadButton"
        android:layout_width="match_parent"
        android:layout_height="wrap_content"
        android:text="Click Here to Download" />

    <ImageView
        android:id="@+id/imageView"
        android:layout_width="match_parent"
        android:layout_height="match_parent"
        android:contentDescription="Your image will appear here" >
    </ImageView>

</LinearLayout>


import java.io.InputStream;

import org.apache.http.HttpEntity;
import org.apache.http.HttpResponse;
import org.apache.http.HttpStatus;
import org.apache.http.client.methods.HttpGet;
import org.apache.http.impl.client.DefaultHttpClient;
import android.app.Activity;
import android.app.ProgressDialog;
import android.graphics.Bitmap;
import android.graphics.BitmapFactory;
import android.os.AsyncTask;
import android.os.Bundle;
import android.util.Log;
import android.view.View;
import android.view.View.OnClickListener;
import android.widget.Button;
import android.widget.ImageView;

public class ImageDownladerActivity extends Activity {

    private ImageView downloadedImg;
    private ProgressDialog simpleWaitDialog;
    private String downloadUrl = "http://www.9ori.com/store/media/images/8ab579a656.jpg";

    @Override
    public void onCreate(Bundle savedInstanceState) {
        super.onCreate(savedInstanceState);
        setContentView(R.layout.asynch);
        Button imageDownloaderBtn = (Button) findViewById(R.id.downloadButton);

        downloadedImg = (ImageView) findViewById(R.id.imageView);

        imageDownloaderBtn.setOnClickListener(new OnClickListener() {

            @Override
            public void onClick(View v) {
                // TODO Auto-generated method stub
                new ImageDownloader().execute(downloadUrl);
            }

        });
    }

    private class ImageDownloader extends AsyncTask {

        @Override
        protected Bitmap doInBackground(String... param) {
            // TODO Auto-generated method stub
            return downloadBitmap(param[0]);
        }

        @Override
        protected void onPreExecute() {
            Log.i("Async-Example", "onPreExecute Called");
            simpleWaitDialog = ProgressDialog.show(ImageDownladerActivity.this,
                    "Wait", "Downloading Image");

        }

        @Override
        protected void onPostExecute(Bitmap result) {
            Log.i("Async-Example", "onPostExecute Called");
            downloadedImg.setImageBitmap(result);
            simpleWaitDialog.dismiss();

        }

        private Bitmap downloadBitmap(String url) {
            // initilize the default HTTP client object
            final DefaultHttpClient client = new DefaultHttpClient();

            //forming a HttoGet request
            final HttpGet getRequest = new HttpGet(url);
            try {

                HttpResponse response = client.execute(getRequest);

                //check 200 OK for success
                final int statusCode = response.getStatusLine().getStatusCode();

                if (statusCode != HttpStatus.SC_OK) {
                    Log.w("ImageDownloader", "Error " + statusCode +
                            " while retrieving bitmap from " + url);
                    return null;

                }

                final HttpEntity entity = response.getEntity();
                if (entity != null) {
                    InputStream inputStream = null;
                    try {
                        // getting contents from the stream
                        inputStream = entity.getContent();

                        // decoding stream data back into image Bitmap that android understands
                        final Bitmap bitmap = BitmapFactory.decodeStream(inputStream);

                        return bitmap;
                    } finally {
                        if (inputStream != null) {
                            inputStream.close();
                        }
                        entity.consumeContent();
                    }
                }
            } catch (Exception e) {
                // You Could provide a more explicit error message for IOException
                getRequest.abort();
                Log.e("ImageDownloader", "Something went wrong while" +
                        " retrieving bitmap from " + url + e.toString());
            }

            return null;
        }
    }
}

you can find 

Difference between Handler and AsyncTask in Android

Difference between Handler and AsyncTask in Android

Handler and AsyncTasks are way to implement multithreading in android with UI/Event Thread. Handler is available since Android API level 1 & AsyncTask is available since API level 3.

Android Handler

1) Handler allows to add messages to the thread which creates it and It also enables you to schedule some runnable to execute at some time in future.
2) The Handler is associated with the application’s main thread. It handles and schedules messages and runnables sent from background threads to the app main thread.
3) If you are doing multiple repeated tasks, for example downloading multiple images which are to be displayed in ImageViews (like downloading thumbnails) upon download, use a task queue with Handler.
4) There are two main uses for a Handler. First is to schedule messages and runnables to be executed as some point in the future; and second Is to enqueue an action to be performed on a different thread than your own.
5) Scheduling messages is accomplished with the the methods like post(Runnable), postAtTime(Runnable, long), postDelayed(Runnable, long), sendEmptyMessage(int), sendMessage(Message), sendMessageAtTime(Message, long), and sendMessageDelayed(Message, long) methods.
6) When a process is created for your application, its main thread is dedicated to running a message queue that takes care of managing the top-level application objects (activities, broadcast receivers, etc) and any windows they create.
7) You can create your own threads, and communicate back with the main application thread through a Handler.

Android AsynkTask

1) Async task enables you to implement MultiThreading without get Hands dirty into threads. AsyncTask enables proper and easy use of the UI thread. It allows performing background operations and passing the results on the UI thread.
2) If you are doing something isolated related to UI, for example downloading data to present in a list, go ahead and use AsyncTask.
3) AsyncTasks should ideally be used for short operations (a few seconds at the most.)
4) An asynchronous task is defined by 3 generic types, called Params, Progress and Result, and 4 steps, called onPreExecute, doInBackground, onProgressUpdate and onPostExecute.
5) In onPreExecute you can define code, which need to be executed before background processing starts.
6) doInBackground have code which needs to be executed in background, here in doInBackground we can send results to multiple times to event thread by publishProgress() method, to notify background processing has been completed we can return results simply.
7) onProgressUpdate() method receives progress updates from doInBackground method, which is published via publishProgress method, and this method can use this progress update to update event thread
8) onPostExecute() method handles results returned by doInBackground method.
9) The generic types used are 
a. Params, the type of the parameters sent to the task upon execution
b. Progress, the type of the progress units published during the background computation.
c. Result, the type of the result of the background computation.
10) If an async task not using any types, then it can be marked as Void type.
11) An running async task can be cancelled by calling cancel(boolean) method.


Android Dialog Example

1. Android Dialog – Things to know
A dialog is a visual component which is always attached to an Activity. Dialogs can be created from your Activity’s onCreateDialog(int) callback method. When you use this callback, the Android system automatically manages the state of each dialog and hooks them to the Activity.  When a dialog is requested for the first time, onCreateDialog(int) instantiate the Dialog.  After you create the Dialog, return the object at the end of the method. When you want to show a dialog, call showDialog(int) and pass it an integer that uniquely identifies the dialog that you want to display.
2. Creating the layout
In this example, I am creating a simple LinearLayout and a Button is attached to it. Click event on the button field is handled to display the Dialog.

File: main.xml
<LinearLayout xmlns:android="http://schemas.android.com/apk/res/android"
    android:layout_width="match_parent"
    android:layout_height="wrap_content"
    android:orientation="vertical" >

    <Button
        android:id="@+id/alertDialogBtn"
        android:layout_width="fill_parent"
        android:layout_height="wrap_content"
        android:layout_weight="6.43"
        android:text="Alert Dialog" />

</LinearLayout>

3. Working with Android Activity class

File: DialogActivity.java

import android.app.Activity;
import android.app.AlertDialog;
import android.app.Dialog;
import android.app.AlertDialog.Builder;
import android.content.DialogInterface;
import android.os.Bundle;
import android.view.View;
import android.widget.Button;
import android.widget.Toast;

public class DialogActivity extends Activity {

// Constant for identifying the dialog
private static final int DIALOG_ALERT = 10;

/** Called when the activity is first created. */
@Override
public void onCreate(Bundle savedInstanceState) {
super.onCreate(savedInstanceState);

setContentView(R.layout.main);

Button alertDialog = (Button)findViewById(R.id.alertDialogBtn);
alertDialog.setOnClickListener(new View.OnClickListener() {
public void onClick(View v) {
showDialog(DIALOG_ALERT);
}
});
}

@Override
protected Dialog onCreateDialog(int id) {
switch (id) {
case DIALOG_ALERT:
Builder builder = new AlertDialog.Builder(this);
builder.setMessage("This will end the activity");
builder.setCancelable(true);
builder.setPositiveButton("I agree", new OkOnClickListener());
builder.setNegativeButton("No, no", new CancelOnClickListener());
AlertDialog dialog = builder.create();
dialog.show();
}
return super.onCreateDialog(id);
}

private final class CancelOnClickListener implements
DialogInterface.OnClickListener {
public void onClick(DialogInterface dialog, int which) {
Toast.makeText(getApplicationContext(), "Activity will continue", Toast.LENGTH_LONG).show();
}
}

private final class OkOnClickListener implements
DialogInterface.OnClickListener {
public void onClick(DialogInterface dialog, int which) {
Toast.makeText(getApplicationContext(), "I was just kidding", Toast.LENGTH_LONG).show();
}
}

}


How to generate .apk and install into android device


This tutorial will be demonstrate, how to build android code and generate a signed APK and then install in device.

Application testing is one of the vital thing we do soon after development. Due to larger number of devices with different resolution, different OS versions and different capabilities, it is difficult to test the application on all supported devices. Due to this limitation, each of the vendors made application testing easy using virtual devices or so called simulators.  Android uses AVD, Android Virtual devices to test the mobile application.


How to generate signed .apk in android?
1. Download the android Keys and place it in local folder.
2. Right Click on the Project.
3. Find Android Tools>Export Signed Application Package.
4. Select the Project to Export Signed Application Package and Click Next
5. Key store Page selection appears.
6. Enable radio button of use Existing key store.
7. Browse to the local folder of the android keys.
8. Enter the appropriate key password (Same as the key password given while generating key store), Click next.
9. Select the destination folder, where you want to place your newly created .apk. And Click finish.
How to installing android application
Before testing the application either in real device or simulator we need to install it. In android there are various different ways to install the android application (.apk) into simulator or device.
1. Installing .apk to simulator using eclipse

One way of installing android application to android emulator is using Eclipse. Once we create the avd from avd manager, we can run the application directly from the source project from eclipse. For every subsequent change or testing we don’t have to restart the AVD every time.
2. Installing .apk to simulator using ADB utility

If you don’t have access to Eclipse or the ADT Plugin, you can install your application on the emulator using the adb utility. Before installing the application, you need to build and package it into an .apk.

When the emulator is running, you can also connect to the emulator instance’s console to issue commands as needed.
> <adb install <path-to-your-APK>

Gradient List Separator in Android


Gradient List Separator


<?xml version="1.0" encoding="utf-8"?>
<shape
    xmlns:android="http://schemas.android.com/apk/res/android"
    android:shape="rectangle">
    <gradient
        android:angle="0"
        android:startColor="#000000"
        android:endColor="#000000"
        android:centerColor="#97CF4D" />
</shape>

ArrayList to comma separated strings And comma separated strings to an ArrayList.


               /**         * Convert Array List to String Comma              *separated         */


              ArrayList<String> list = new ArrayList<String>();

              list.add("one");

              list.add("two");
              list.add("three");

              StringBuilder sb = new StringBuilder();
              for (String s : list) {
                     sb.append(s);
                     if (sb.length() > 0)
                           sb.append(",");
              }
              String returnedItems = sb.toString();
              System.out.println(returnedItems);
              //OUT PUT one,two,three
            
      /**
       * Convert String Comma separated elements          * into List
       */

              List<String> sellItems = Arrays.asList(returnedItems.split(","));
              System.out.println(sellItems.toString());

              //OUT PUT [one,two,three]

Tuesday 16 July 2013

Custom background for Progress Bar OR Seek bar in Android

Custom background for Progress Bar in Android

we are using same (AsyncTask with Progress Bar) examlpe for this tutorial.
we just added this progressbar_bg.xml in drawable folder.


<?xml version="1.0" encoding="utf-8"?>
<layer-list xmlns:android="http://schemas.android.com/apk/res/android" >

    <item android:id="@android:id/background">
        <shape android:shape="rectangle" >
            <corners android:radius="5dp" />

            <gradient
                android:angle="270"
                android:endColor="@color/light_gray_header_color"
                android:startColor="@color/light_gray_header_color" />
        </shape>
    </item>
    <item android:id="@android:id/secondaryProgress">
        <clip>
            <shape android:shape="rectangle" >
                <corners android:radius="5dp" />

                <gradient
                    android:angle="270"
                    android:endColor="#00996a"
                    android:startColor="#00d190" />
            </shape>
        </clip>
    </item>
    <item android:id="@android:id/progress">
        <clip>
            <shape android:shape="rectangle" >
                <corners android:radius="5dp" />

                <gradient
                    android:angle="270"
                    android:endColor="#00996a"
                    android:startColor="#00d190" />
            </shape>
        </clip>
    </item>


</layer-list>


and here is seek bar bg you can use this one also if you need bg for seek bar


<?xml version="1.0" encoding="UTF-8"?>
<inset xmlns:android="http://schemas.android.com/apk/res/android"
    android:insetBottom="1.0px"
    android:insetLeft="1.0px"
    android:insetRight="1.0px"
    android:insetTop="0.0px" >

    <selector>
        <item android:state_pressed="true">
            <shape>
                <gradient
                    android:angle="270.0"
                    android:endColor="@color/rounded_container_bg"
                    android:startColor="@color/rounded_container_bg" />

                <corners android:radius="11.0dip" />
            </shape>
        </item>
        <item>
            <shape>
                <stroke
                    android:width="1.0px"
                    android:color="@color/rounded_container_border" />

                <gradient
                    android:angle="270.0"
                    android:endColor="@color/rounded_container_bg"
                    android:startColor="@color/rounded_container_bg" />

                <corners android:radius="10.0dip" />
            </shape>
        </item>
    </selector>


</inset>


I hope this will helpful.
Happy Codddding :)